How to Enable Intel Virtualization Technology (VT-x) in BIOS/UEFI
Enabling Intel Virtualization Technology (VT-x) allows your computer to efficiently run virtual machines and is often required for certain software applications. Follow these steps to enable VT-x in your BIOS/UEFI settings:
1. Restart Your Computer 🔄
Begin by restarting your computer to access the BIOS/UEFI settings.
2. Enter BIOS/UEFI Settings ⚙️
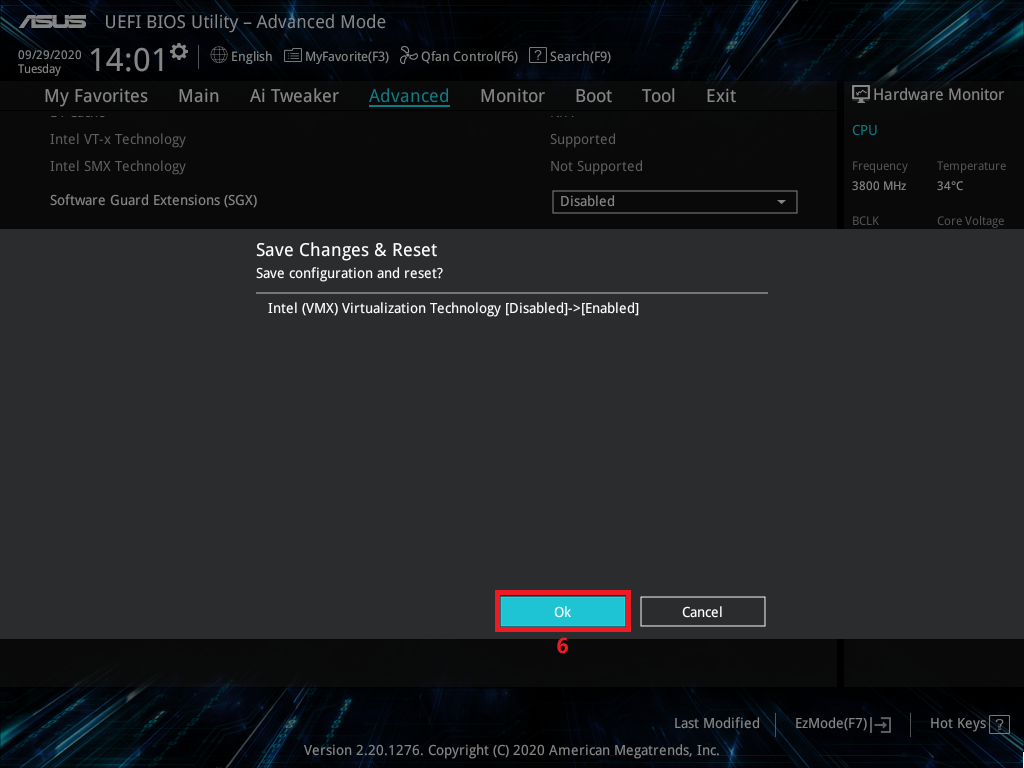
As soon as your computer restarts, repeatedly press the F2, Del, F10, or Esc key (the specific key may vary depending on your motherboard model) to enter the BIOS/UEFI settings.
3. Navigate to Advanced Settings ⚙️
Once in the BIOS/UEFI menu, use the arrow keys to navigate to the ‘Advanced’ tab or a similar section where hardware configurations are located.
4. Find Virtualization Technology Options 🔍
Look for options labeled as ‘Intel Virtualization Technology’, ‘VT-x’, ‘Virtualization’, or ‘Intel VT’.
5. Enable Intel Virtualization Technology ✅
Select the virtualization option and change its setting to ‘Enable’ or ‘On’.
6. Save Changes and Exit 💾
Navigate to the ‘Save & Exit’ menu and select ‘Save Changes and Exit’ to apply the changes.
7. Restart Your Computer 🔄
Your PC will restart with Intel Virtualization Technology enabled, allowing you to use virtualization features.
By following these steps, you can ensure that Intel VT-x is enabled, providing support for virtualization tasks on your computer.
EXAMPLE - MOTHERBOARD ASUS
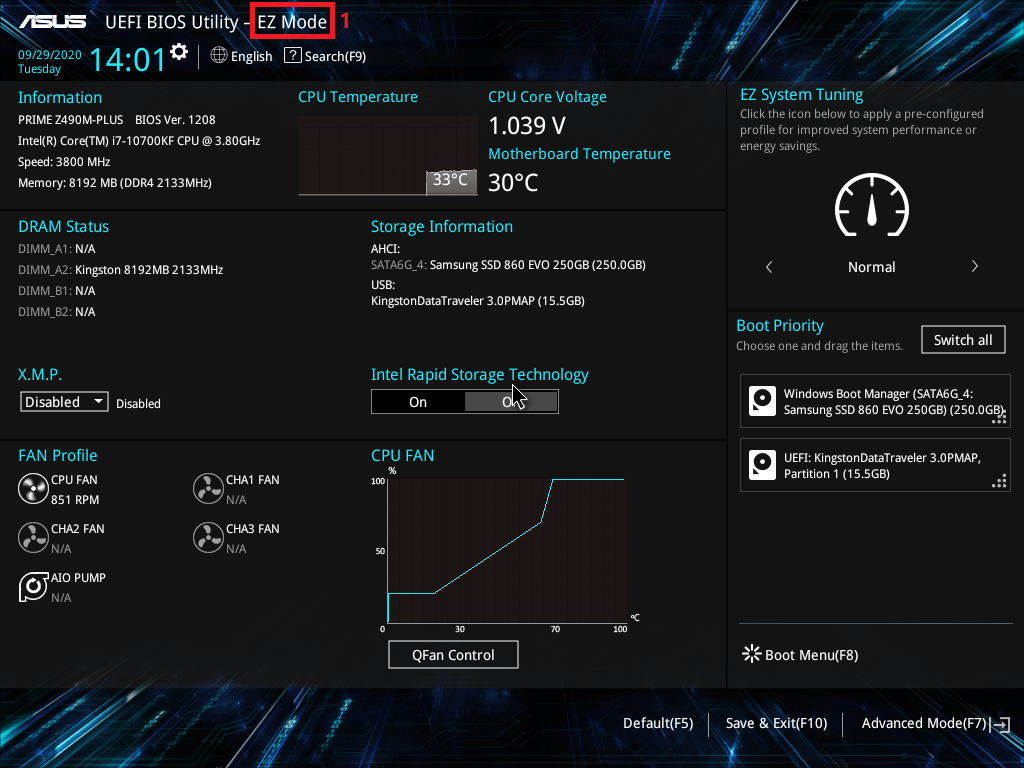
1. Power on the system and press[delete] key to enter BIOS [EZ Mode]
2. Press [F7] key to enter BIOS [Advance Mode] as below picture:
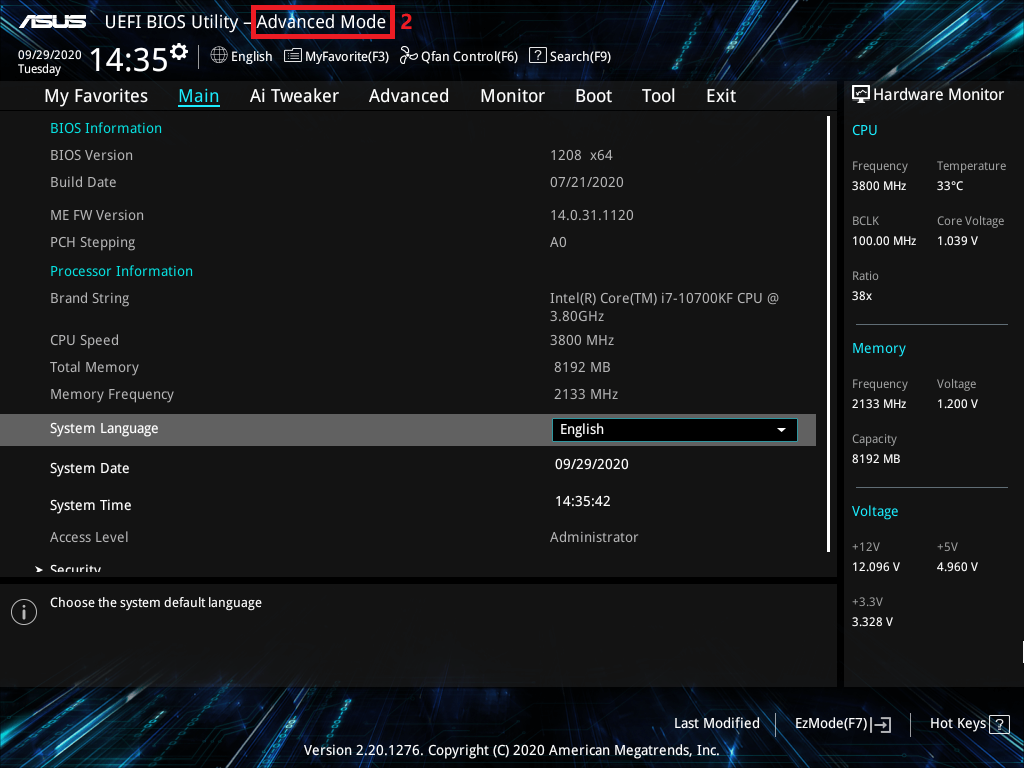
(If press [delete] key to enter [Advanced Mode] directly and then no need to press [F7] key any more)
3. Select [Advanced] page and click [CPU Configuration] item
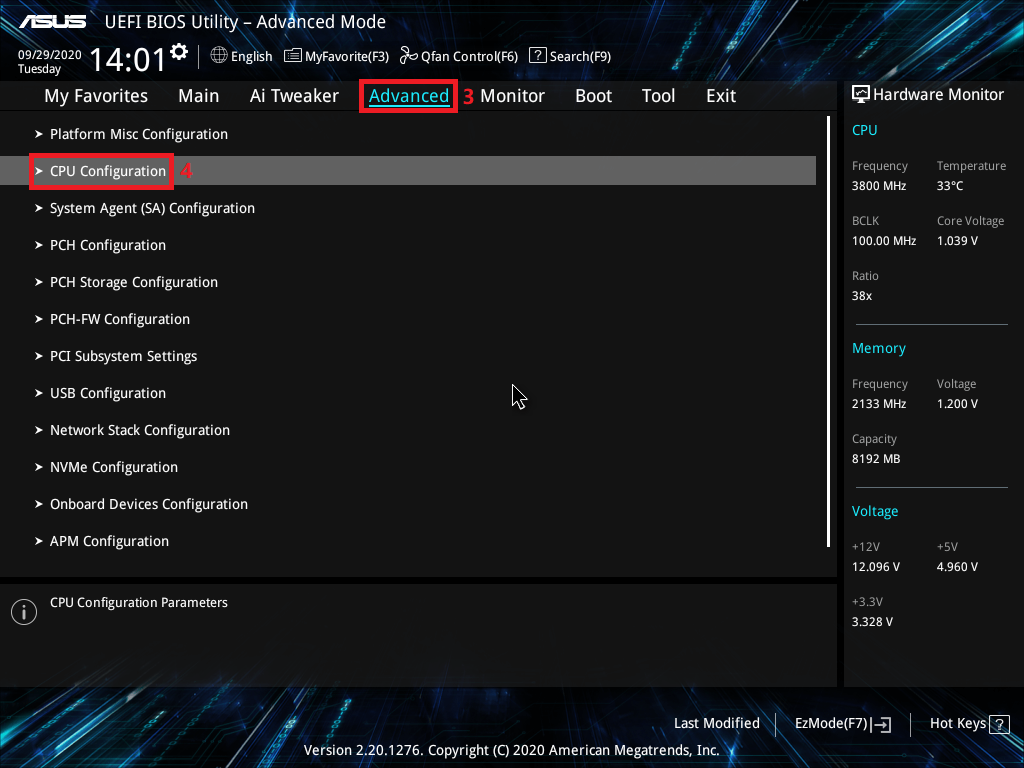
4. Select [Intel(VMX) Virtualization Technology] item and set to [Enabled]
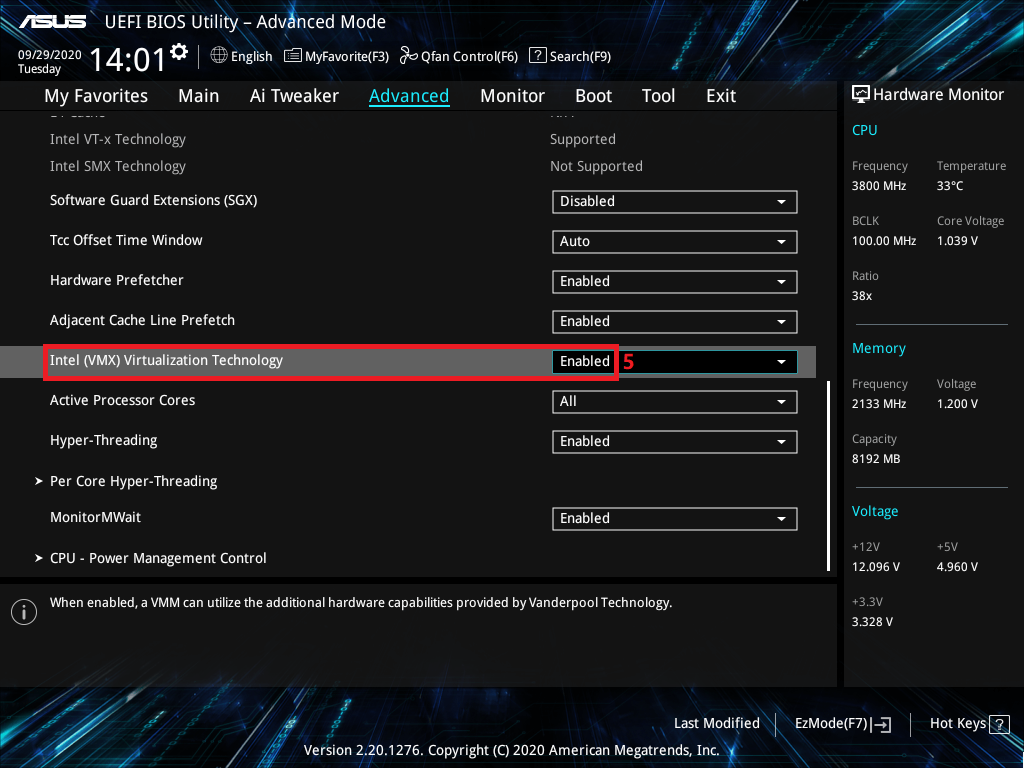
5. Press [F10] key and click [OK] ,the system will auto reboot
