How to Disable Secure Boot in BIOS/UEFI


1. Restart Your Computer 🔄
Start by restarting your computer to access the BIOS/UEFI settings.

2. Enter BIOS/UEFI Settings ⚙️
As soon as your computer restarts, repeatedly press the F2, Del, F10, or Esc key (depending on your motherboard model) to enter the BIOS/UEFI settings.

3. Navigate to Boot Settings 🚀
Once in the BIOS/UEFI menu, use the arrow keys to navigate to the ‘Boot’ tab.

4. Find Fast Boot Option 🔍
Look for an option labeled ‘Fast Boot,’ ‘Boot Mode,’ or something similar.

5. Enable Fast Boot ✅
Select the ‘Fast Boot’ option and change its setting to ‘Enable’ or ‘On.’

6. Save Changes and Exit 💾
Go to the ‘Save & Exit’ menu and select ‘Save Changes and Exit’ to apply the changes.

7. Restart Your Computer 🔄
Your PC will restart with fast boot enabled, completing the process.

EXAMPLE - MOTHERBOARD MSI

1: Boot to the designated firmware settings on your computer.

2: Click on the Boot tab.

3: Choose Fast Boot from the drop-down menu behind Next Boot after the AC Power Loss section. Then set the status of Fast Boot to Enabled. Here, we take the ASUS Fast Boot for example.
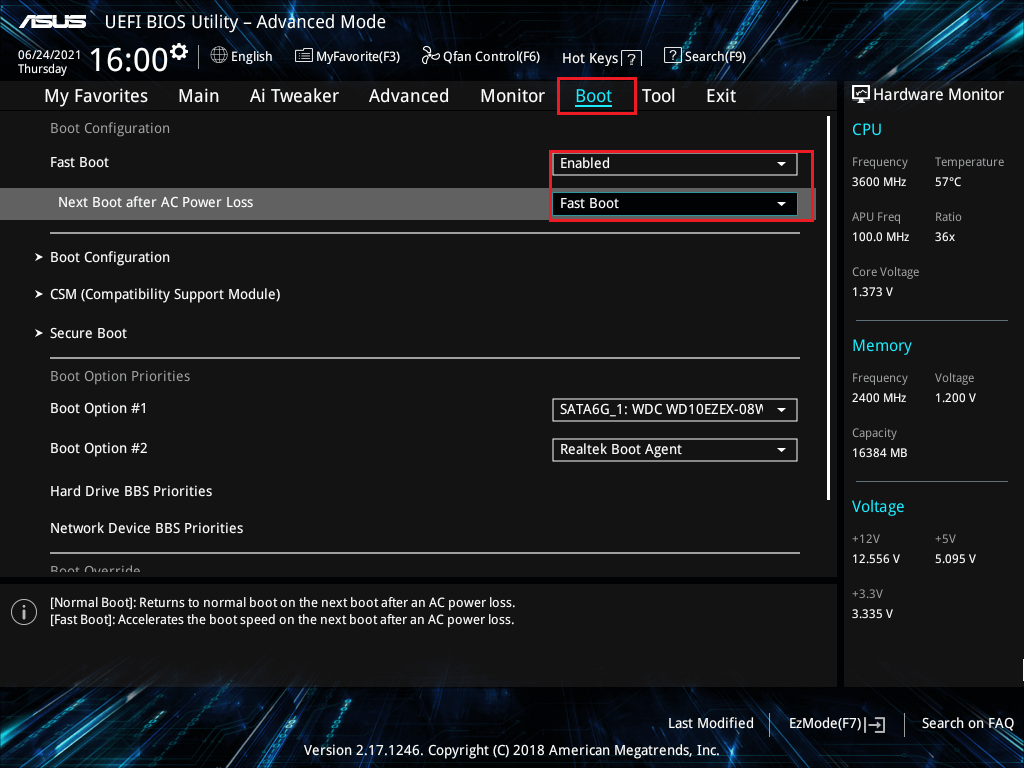
 

msi fast boot 3

4: Click the Exit icon at the top bar and then choose Save changes and Exit.

5: Now, restart your computer. Then the PC will boot with Fast Boot enable